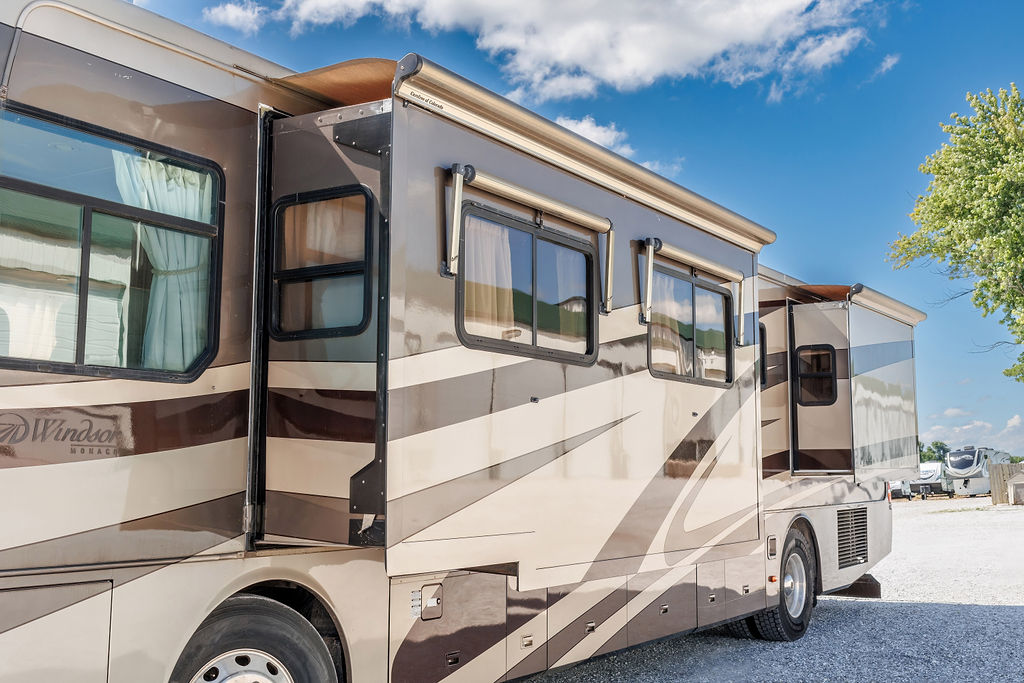
Knowing how to fix RV slide out problems is something most RV owners will need at some point. RV slideout issues are the second most common repair issue we see repair requests for through the RV Help platform, right behind air conditioner failures. Out of more than 12,000 service requests we analyzed, over 1,200 involved slideout-related issues, covering the full range of common problems with RV slide outs.
Does that mean you should avoid buying an RV that has slideouts? Not necessarily. The majority of RV slide problems trace back to one of two things: operator error, or neglected maintenance. That's actually good news, because both of those things are within an owner's control.
This article covers RV slide out troubleshooting for the most common issues owners run into, what’s actually causing them, and what to try before calling a technician. For a full breakdown of proper operating procedures and maintenance, see our companion guide on keeping your slideouts in good shape.
Most RV Slide Problems Are Preventable
Before diving into RV slideout troubleshooting, it's worth understanding why so many of these problems happen in the first place. Two factors account for the vast majority of RV slideout issues RV techs get called out for. Understanding the root causes of RV slide out issues makes troubleshooting much more straightforward.
RV Slideout Issues Caused by User Error
Operating slides without adequate battery power is one of the most common contributors to slideout problems. RV slideouts are heavy and require a decent amount of electrical power to move. Running a slideout on low voltage stresses the motor, can cause thermal overload, and accelerates wear on gear components. Running the engine or connecting to shore power before operating slides is one of the simplest things you can do to reduce RV slide out problems over the life of your rig.
A few other habits that cause problems over time: stopping and starting the slide mid-cycle instead of holding the switch through the full travel, not clearing the slideout roof of debris before retracting, and not holding the switch for a few extra seconds at full extension and retraction to let the controller register its reference point. That last one is especially important for electric in-wall systems and is covered in more detail in the Schwintek section below.
For the full list of operating best practices, see our RV slideout care guide.
RV Slideout Issues Caused by Lack of Maintenance
The other major maintenance failure that leads to RV slideout problems is failing to regularly use slideout lubrication (or using the wrong type of lubrication) on systems that need it. Gear-driven and rack and pinion systems require routine lubrication to keep the gear teeth and rails moving smoothly. When lubrication is neglected, friction builds up, motors work harder than they should, and components wear out faster.
The wrong lubricant causes a different set of problems: oil-based products attract dirt and grit that work their way into the gear teeth and accelerate wear.
Using the right product for your specific system on a regular schedule is one of the most straightforward things you can do to extend the life of your RV slideouts. Our companion guide on slideout care covers lubrication by system type in detail.
Common RV Slideout Problems and What to Check
Here are the most common RV slideout problems owners contact techs about, and where to start with RV slideout troubleshooting before calling in a pro.
RV Slide Out Not Working: Won’t Extend, Retract, or Is Stuck
This is the single most common mechanical slideout complaint in our data, accounting for nearly 500 service requests in the first year after RV Help launched. Low battery voltage is the cause more often than not. Before assuming anything is mechanically wrong, run the engine (if you have a motorhome) or connect to shore power and try again.
If you're camping off-grid in a trailer without access to shore power, a generator connected through the trailer's shore power inlet is your best option for getting enough voltage to operate the slide.
If power isn't the issue, work through these checks:
Look for obstructions inside and outside the coach.
Make sure travel locks have been removed.
Check for a blown fuse on the slide motor circuit.
Listen to the motor. If it runs but the slide doesn't move, the gears may not be engaging. That will require a technician.
If the slideout starts to move and then stops, it may be thermal overload from low voltage. Try shore power, wait a few minutes, then try again.
On Schwintek systems, a motor out of sync can cause the slide to travel only partway rather than stopping completely. If that's what you're seeing, try the retiming procedure in the next section before calling a tech.
Every slideout system has a manual override for emergency retraction. Consult your owner's manual for the correct procedure for your specific system. Do not attempt to force the slide manually without following those instructions.
If none of the above resolves the issue and the slideout is moving slowly or only partway, or if an RV slide out stuck situation isn’t clearing with the steps above, the motor may be weakening. The same applies when an RV slide out not closing all the way is a recurring pattern rather than a one-time issue. Have a technician evaluate it sooner rather than later, because a motor showing early signs of failure is a much cheaper fix than one that has been running under strain for another season or two.
RV Slide Out Crooked: Schwintek Slide Sync Issues and How to Fix Them
If you’re thinking “my RV slide out is crooked,” you’re not alone. This came up in nearly 12% of all slideout service requests in our data, making it one of the most common RV slide out problems overall. It’s also one of the most frequently owner-fixable issues without a service call.
You can identify a Schwintek system by the aluminum tracks with small worm-gear grooves running along them, visible on the outside sidewalls of the slide box near the top and bottom corners, seen in the photo below:
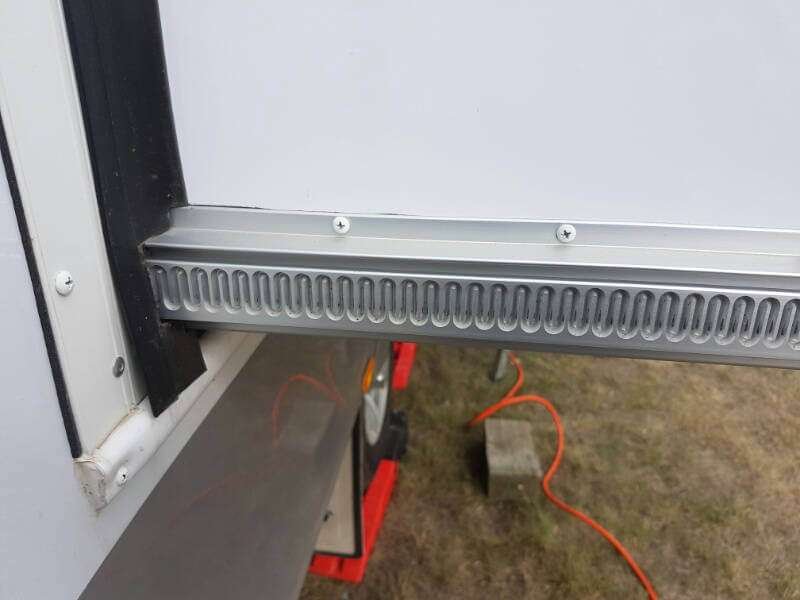
The Schwintek system uses two motors, one on each side of the slide. When they lose their reference points, they stop running in coordination, and the slideout moves unevenly. Lippert (the manufacturer) calls this being "out of time".
Here's the retiming procedure described on the Lippert website:
Press the OUT button and hold until the slide is fully extended.
Press the IN button and retract 8 to 10 inches.
Press OUT again until fully extended.
Repeat a minimum of three times, until both sides move together.
To prevent this from happening in the future: hold the switch for 3 to 5 seconds after the slideout reaches full extension or full retraction before releasing. This gives the controller time to register its zero point. It sounds minor, but according to the article linked above, it's the single most effective habit for avoiding Schwintek sync issues.
If retiming doesn't resolve the problem, or if the slide is visibly twisting or racking rather than just uneven, stop operating it and call a certified RV technician. Continuing to run a severely out-of-sync Schwintek can destroy the system.
RV Slide Out Leak Repair: Water Getting In Around the Slideout
Leaking slide outs accounted for 183 service requests in our data for 2025, making water intrusion the most common slideout issue after mechanical failure. Neglected seals are the leading cause.
Start your annual slideout inspection with the seals. Look for anything cracked, dried out, torn, or dislodged, and check both the exterior seals and the interior ones. Interior seals are easy to overlook but matter just as much.
If the seals look intact, check the sealants around corner moldings and any window frames on the slide body. Also inspect the seam where the slideout topper meets the coach body. That seam is a common water entry point that often goes unnoticed.
Note that some residual water on the slide surface after rain is normal. As Keystone RV explains in their guide on RV slideout care, seals are designed to seal when the slide is closed, not to act as squeegees on the way in. Wiping up a little water with a towel after retracting is not a sign of a problem.
If you can confirm water is getting in but can't locate the source, a technician can perform a water intrusion test.
Wiper Seals Are Cracked or Damaged
Wiper seals can wear out over time due to being compressed every time the slide retracts and exposed to UV light whenever the slide is extended. Cracked or damaged seals need to be addressed promptly to prevent water intrusion.
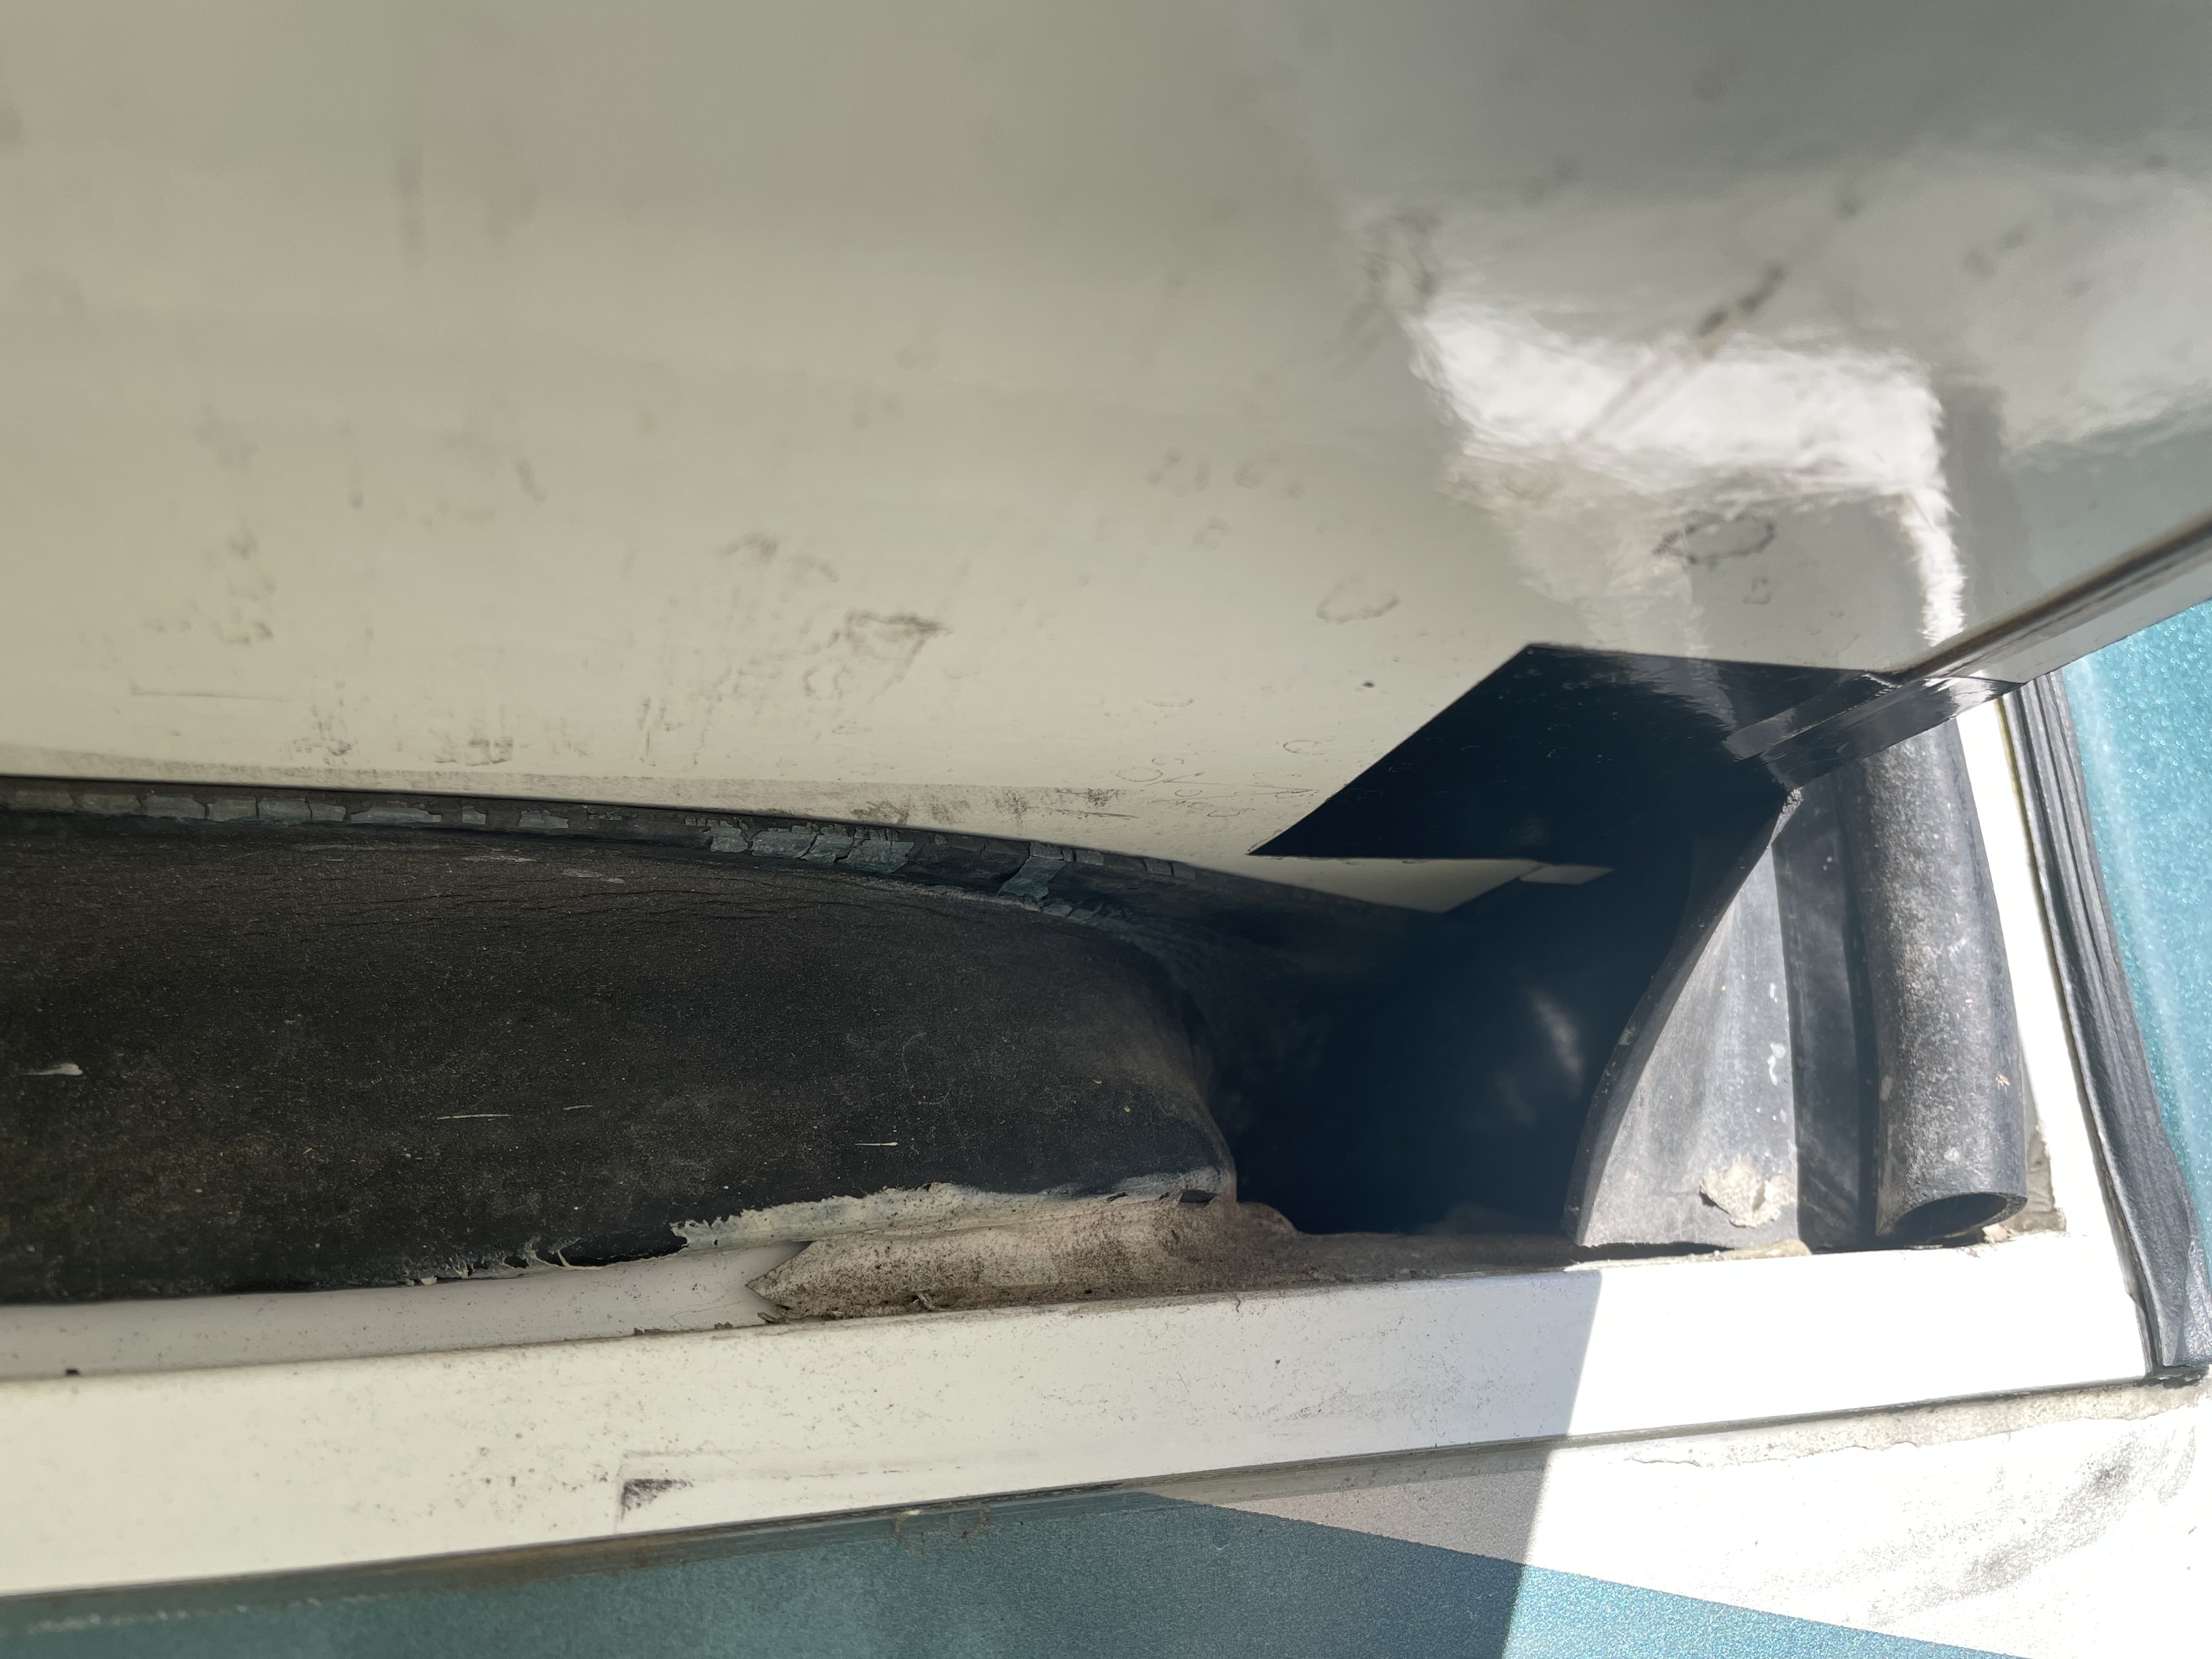
Wiper seal replacement is a repair many owners can do themselves. Replacement seals are available from online RV parts suppliers, and the installation typically involves removing the old seal from its channel and pressing or stapling the new one in. That said, if you're not confident in getting a complete seal around all four sides, or if there's any question about whether water has already gotten in, having a certified RV technician do the replacement and check for existing moisture damage is worth the cost.
RV Slideout Making an Unusual Noise
What kind of noise matters here, because the right response depends on the system and the sound.
Rattling during travel: The slide may not be fully retracted, or a travel lock may need adjustment.
Chattering or vibration while cycling: Usually means the slideout roof needs waxing. Try cleaning and waxing the roof before assuming a mechanical issue. (Source: Winnebago’s guide to RV Slideout Best Practices & Maintenance)
Squeaking or grinding on rack and pinion systems: Over time, the drive shaft contact points in the gear pack can develop friction that produces a squeaking sound. If that's what you're hearing, a dry silicone lubricant applied to the drive shaft contact points may resolve it. Do not apply anything to the rack or pinion gear teeth themselves, and avoid oil or grease entirely. (Source: Lippert Slide-Out System manual)
Noise or vibration on through-frame systems after winter driving: Road salt and de-icing chemicals are a common cause of noise in through-frame slideout systems. Try washing down the undercarriage before reaching for lubricant. The noise often clears up after a good wash. (Source: Norco Chassis Frame Care and Undercarriage Maintenance guide)
Slide Won't Stay Retracted While Driving
Some slideout systems have a locking mechanism that holds the slideout retracted during travel. If that mechanism fails, the slide can begin to extend while the vehicle is moving. That's a serious safety issue, and if this happens while you’re driving you should find a safe place to pull over.
Most systems have a way to manually engage the locking mechanism. Consult your owner's manual or call a technician for guidance specific to your system. (This is a perfect use case for the “Offers Free Troubleshooting” search filter available to RV Help’s Pro Members.)

If you discover a malfunction with your locking mechanism on a travel day and need to move the RV before you can get it repaired, an emergency temporary fix is to wedge a board such as a length of 2x4 lumber between the interior coach wall and the back of the slide trim to physically prevent movement. This is a one-time emergency workaround, not a repair. Have the mechanism properly repaired by a certified RV technician before the RV is used for regular travel again.
Slideout Cable Broke
Cable breaks on cable-driven slideout systems showed up in 38 service requests in our data. According to BAL/Norco, cable failures in properly installed systems are rare. When they do occur, the cause is almost always improper installation that creates kinking in the cable over time rather than normal wear.
This distinction matters because the root cause has to be identified and corrected when the cable is replaced. Putting in a new cable without fixing what caused the kinking will result in the same failure again. This is a job for a qualified technician.
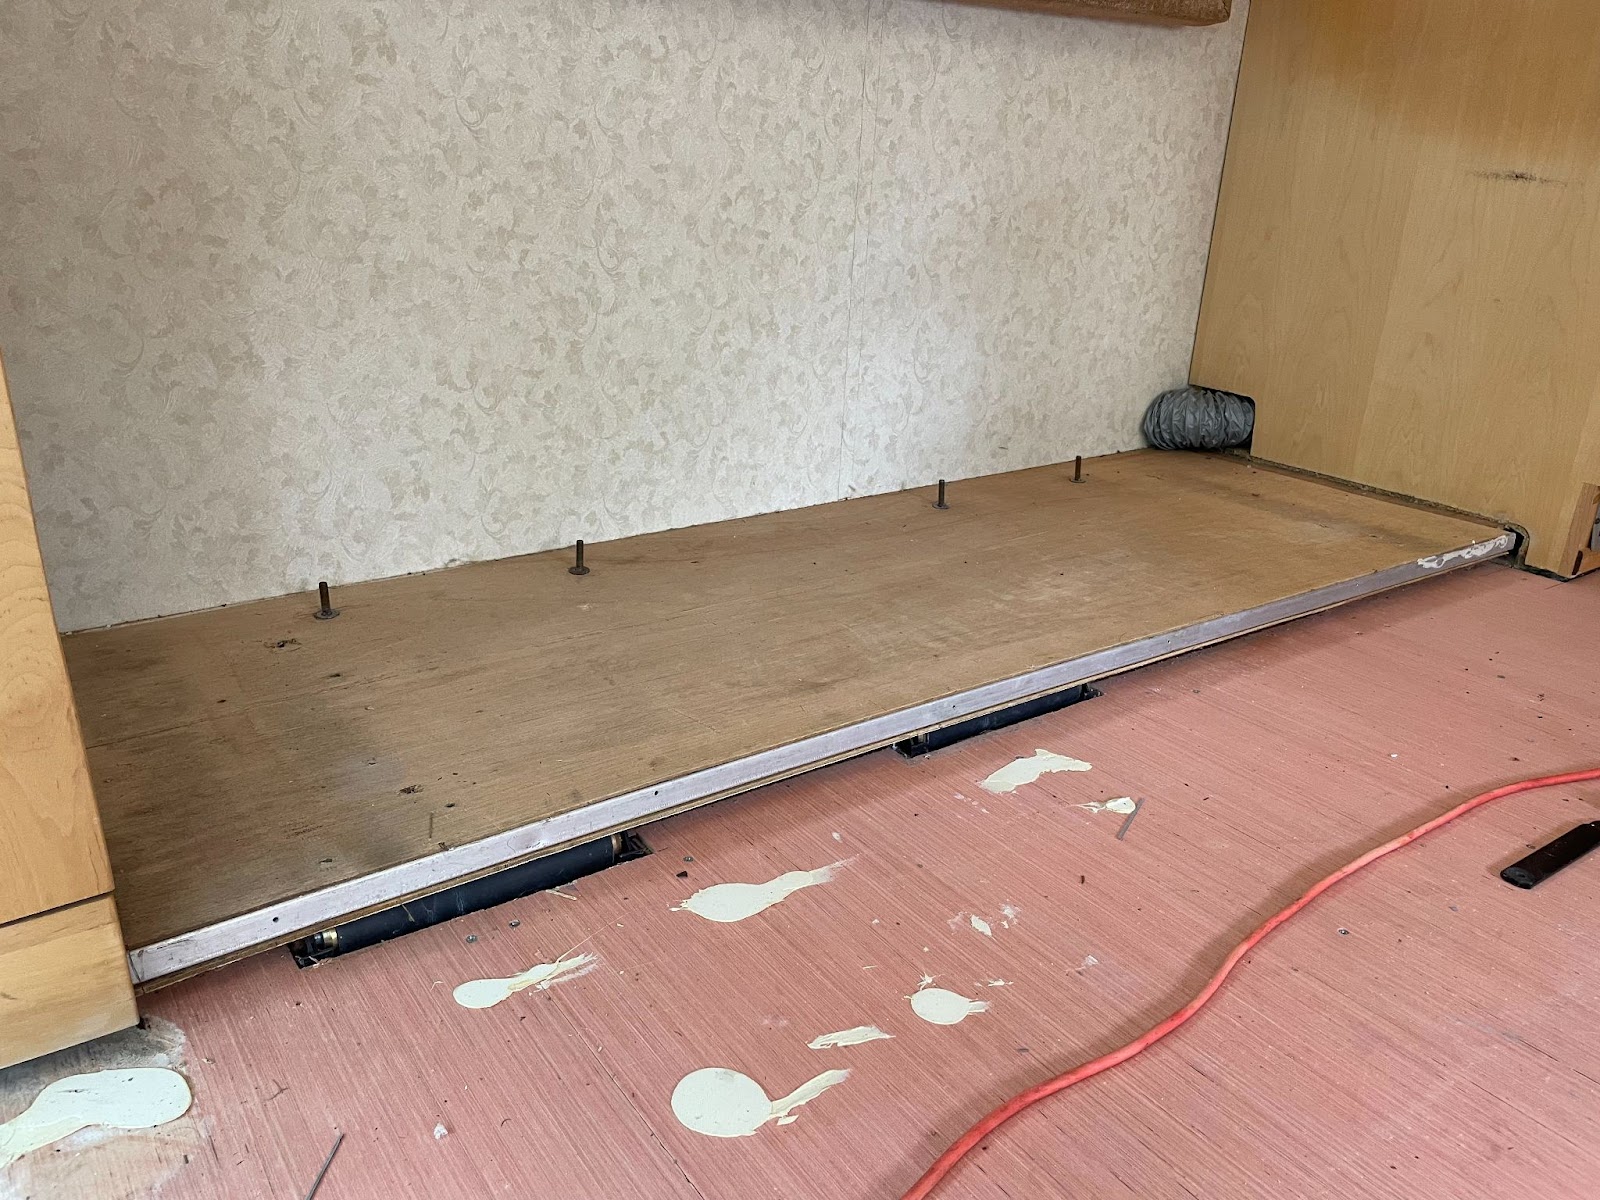
RV Slide Out Floor Repair: Soft or Rotting Floors
Slideout floor damage appeared in 29 service requests in our data. It's almost always the downstream result of long-term undetected water intrusion through failed seals or sealants. By the time the floor is noticeably soft, the water damage has usually been developing for a while and is more extensive than it appears from the surface.
Assessing and repairing this properly usually requires a technician, or at least someone who is very handy and capable with construction and remodeling. Keep in mind that the full extent of water intrusion into walls and structural components may extend beyond the visible damage.
The prevention is straightforward: inspect and maintain your seals consistently, and address any damage or gaps in sealant as soon as you notice them. The cost of a replacement seal is nothing compared to the cost and time involved with replacing the floor of an RV slideout.
Fault Code on the Slideout Controller
If a fault code appears on your slideout controller, stop operating the slideout. The controller detected a problem and shut down to prevent further damage.
Lippert's website has resources for troubleshooting RV slideouts, and it's worth checking there first. If the fault doesn't clear after following the manufacturer's troubleshooting steps, call a certified RV technician.
Frequently Asked Questions About Problems with RV Slideouts
Are RV slideouts a problem?
Slideouts are one of the most popular features in modern RVs, and the majority of owners use them without significant issues when they're operated and maintained correctly. That said, they are the second most common source of repair requests on the RV Help platform, so the question is understandable.
The honest answer is that slideouts are only a problem when they're not taken care of. Well-maintained slideouts on an RV that's operated correctly generally hold up well. Neglected slides on an RV where operating shortcuts are common tend to need frequent repairs.
What are the most common RV slideout problems?
Based on service requests submitted through RV Help, the most common issues are: slides that won't extend or retract (usually a power issue), Schwintek sync problems producing a crooked or uneven slide, water intrusion through failed seals, and noise during operation. These four categories account for the large majority of common problems with RV slideouts that owners contact techs about.
Can I fix RV slideout issues myself?
It depends on the issue. Low voltage issues, basic obstructions, blown fuses, and Schwintek retiming are all things owners can typically address without a tech. Seal cleaning and conditioning is entirely a DIY maintenance task. For water intrusion from an unidentified source, motor failure, gear or track damage, locking mechanism failure, and floor rot, a technician is recommended or required.
When in doubt, a quick call to a certified RV technician to describe what you're seeing is usually enough to tell you whether you need hands-on help or just a few steps to try yourself.
How much does RV slide out repair cost?
The cost of an RV slideout repair varies widely depending on what's wrong, what system you have, and where you're located. A simple fix like a blown fuse or a Schwintek retiming won’t break the bank, but a motor replacement, water leak repair, or anything that requires removing the slide will run more. Water damage to the floor or walls of a slide room can be one of the more expensive repairs an RV owner faces.
The best way to get an accurate estimate for your specific situation is to have a technician assess it. RV Help connects you with certified mobile RV technicians who can come to wherever you are for RV slideout repair. You can search for a tech in your area and reach out for a quote directly through the platform.
How do I know if my RV slideout is out of sync?
On Schwintek in-wall systems, the most visible sign is one side of the slideout extending or retracting noticeably ahead of the other, producing a crooked or lopsided appearance. You may also hear uneven motor sounds during operation. The retiming procedure described in this article resolves this in most cases. If the slide is visibly twisting or racking rather than just uneven, stop operating it and call a technician.
How do I prevent RV slideout problems?
The two most effective things you can do are operate your slideouts correctly every time and keep up with seal maintenance. Always run the engine or connect to shore power before operating slides. Always check the slideout roof for debris before retracting. Always hold the switch 3 to 5 seconds past full extension and retraction. Inspect and clean your seals before and after every trip. Condition them twice a year. Address any damage immediately.
Our companion guide on slideout care and maintenance covers all of this in detail, including the common problems with RV slideouts that stem from skipped upkeep.
Final Thoughts On Fixing RV Slideout Issues
Most RV slideout problems aren't random failures. They're the result of habits and missed maintenance tasks that accumulate over time. The good news is that the same things that prevent most problems are also simple: operate your slides with adequate power, check for debris before retracting, keep the seals in good condition, and don't ignore small issues while they're still small.
When something does go wrong that's beyond a DIY check, use RV Help to connect with a certified mobile RV technician in your area who can come to your location. And if you want to get ahead of problems before they start, our companion article on keeping your slideouts in good working order covers everything you need to know.
FREE RV Maintenance Checklist Spreadsheet
A printable and editable spreadsheet to help you stay on top of RV maintenance tasks. Organized by frequency, with space to add notes and track completion dates, so you can keep your RV in top condition year-round.
By submitting this form, you'll receive our newsletter and the free download. You can unsubscribe at any time.