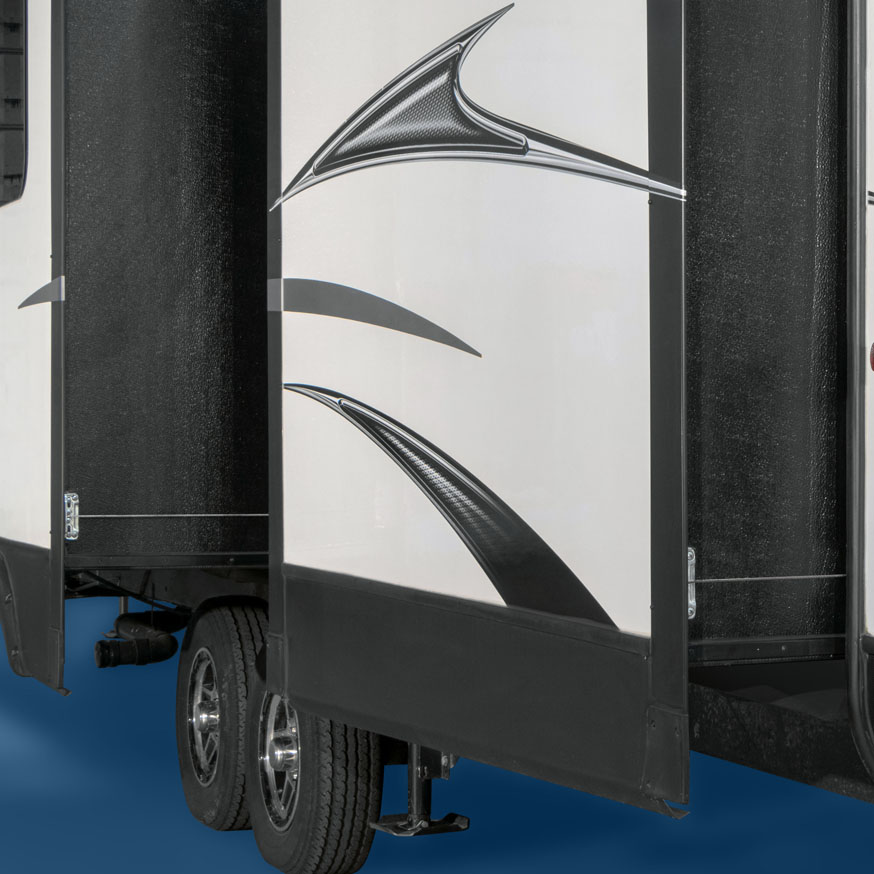
RV slideout maintenance is one of those things that's easy to put off until a slide stops working in the middle of a trip. It doesn't have to be that way. Most slideout problems are preventable, and the maintenance itself isn't complicated; it just requires knowing what to do and doing it consistently.
This guide covers everything that goes into proper RV slide maintenance: how to operate your slides correctly, what to inspect and maintain on a regular basis, and how to handle RV slide out lubrication for your specific system. Before diving in, pull out your owner's manual and your slideout system manufacturer's documentation. The steps in this guide apply broadly, but your manufacturer's instructions take precedence on anything system-specific (especially lubrication).
Once you have your manual handy, go ahead and save a digital copy somewhere you'll actually have access to when you need it. The Virtual Glovebox section of the RV Help app lets you upload your owner's manual as a PDF or paste a link to one, and store any relevant parts numbers alongside it. When you're troubleshooting at a campground or talking to a tech on the phone, having that information available on your phone is invaluable.
Section 1: How You Use Your Slideouts Matters
A lot of slideout problems start with a small operational habit or overlooked step that puts extra stress on the system over time. Understanding how to properly operate your slides will help you avoid issues caused by user error.
Before You Extend
Before extending your slide outs, walk the outside perimeter of the RV and check for anything a slide could hit, like trees, picnic tables, or utility poles.
Close any outside storage bays located underneath the slide before extending. Inside, check the floor for anything that could get caught under the slide or its rollers. Shoes, pet bowls, and anything else sitting on the floor near the slide path should be moved. Close all cabinet doors inside the slide room, and remove any travel locks or slide bars.
On Class A motorhomes with a slide near the cockpit, move the driver and passenger seats fully forward with the seatbacks upright before operating. A slide that contacts the seatbacks can cause real damage.
Make sure the RV is level and the parking brake is on. For a motorhome, run the engine to ensure adequate 12-volt power before operating the slides, since low voltage is one of the most common causes of slideout motor strain and failure. Some systems specify you level the unit before operating the slideouts, some after. Some specify shore power instead of the engine. In either case, check your manual if you're not sure.
Before You Retract
Before retracting, check the roof of the slideout for debris. Leaves, twigs, pine needles, and acorns collect up there, and pulling the slide in over debris scrapes it against the coach body and damages seals. Make it a habit to check before every retraction.
If water has pooled on the slide roof, a simple way to clear them is to use your RV leveling system to tilt the RV slightly and let the water drain off before retracting.
Do a quick visual check of the gear tracks and seals, clean the interior floor before retracting to avoid scratching the vinyl floor or snagging the carpet, and make sure no one (including pets!) is in the way of the slide room while it's in motion.
While Operating the Slide
Hold the switch continuously throughout the full travel of the slide – don't stop and start mid-cycle. Some slideout systems require you to hold the switch for an additional 3 to 5 seconds before releasing. This allows the controller to register its reference point and keeps the motors in sync. Multiple manufacturers specify this in their documentation, but other slide systems require you to release the button immediately after the slideout has been fully extended or retracted, so consult your owner’s manual to make sure you’re following the operating procedure specific to your RV.
If the slideout binds or jams during operation, stop immediately. Continuing to run the motors against a jammed slide can damage the motors and gear tracks.
Hopefully it goes without saying, but you should never drive with the slideouts extended.
During Storage or Extended Stationary Periods
Keep slideouts retracted when the RV is not in use. This protects seals and components from UV exposure and weather.
If your RV stays parked in one spot for weeks or months at a time while in use, cycle your slideouts in and out periodically. Seals that stay compressed in one position for a long time can dry out and crack. Running the slideouts every few weeks keeps the seals conditioned and gives you a chance to notice any developing mechanical issues before they become urgent. This applies to full-timers, seasonal campers, and anyone storing the rig for the off-season.
When severe weather moves in, retract your slideouts if you can, and if you can’t, make sure they are clear from snow and ice before trying to use them. Heavy snow, freezing rain, and sustained high winds are worth taking seriously too, as these can all take a toll on slide seals and mechanisms. Perform a thorough inspection of your slideouts any type of harsh weather.
Section 2: RV Slideout Maintenance
RV slideout maintenance comes down to a handful of tasks done consistently. Most of them are fairly quick and simple, but neglecting them can lead to expensive repairs later. The sections below cover all the maintenance on RV slide outs that matters most, from seal maintenance to lubrication.
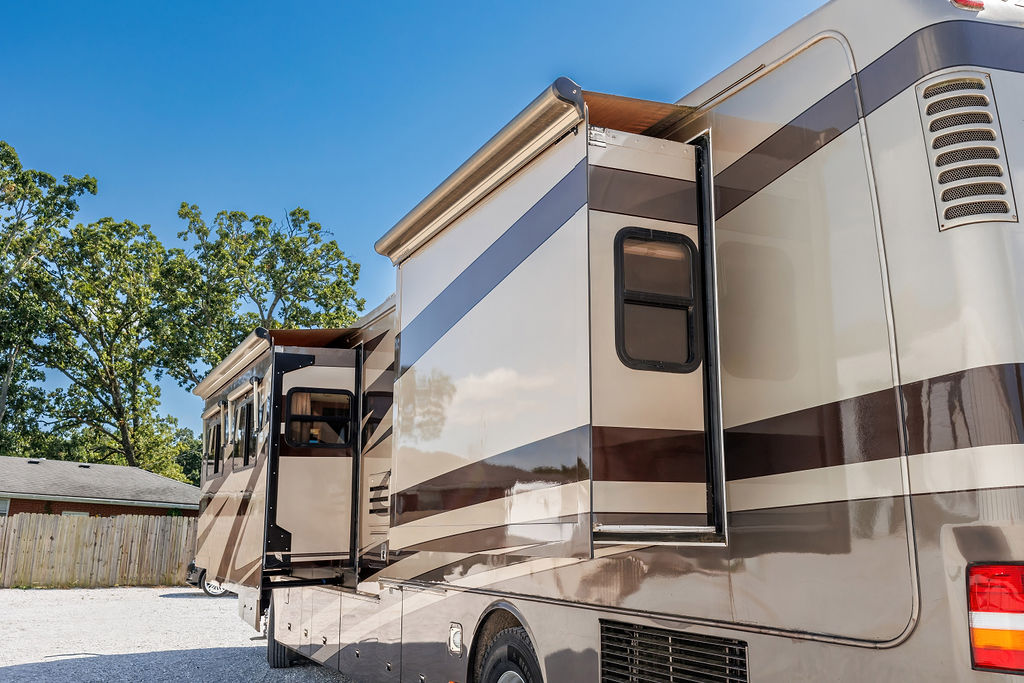
RV Slide Seal Maintenance
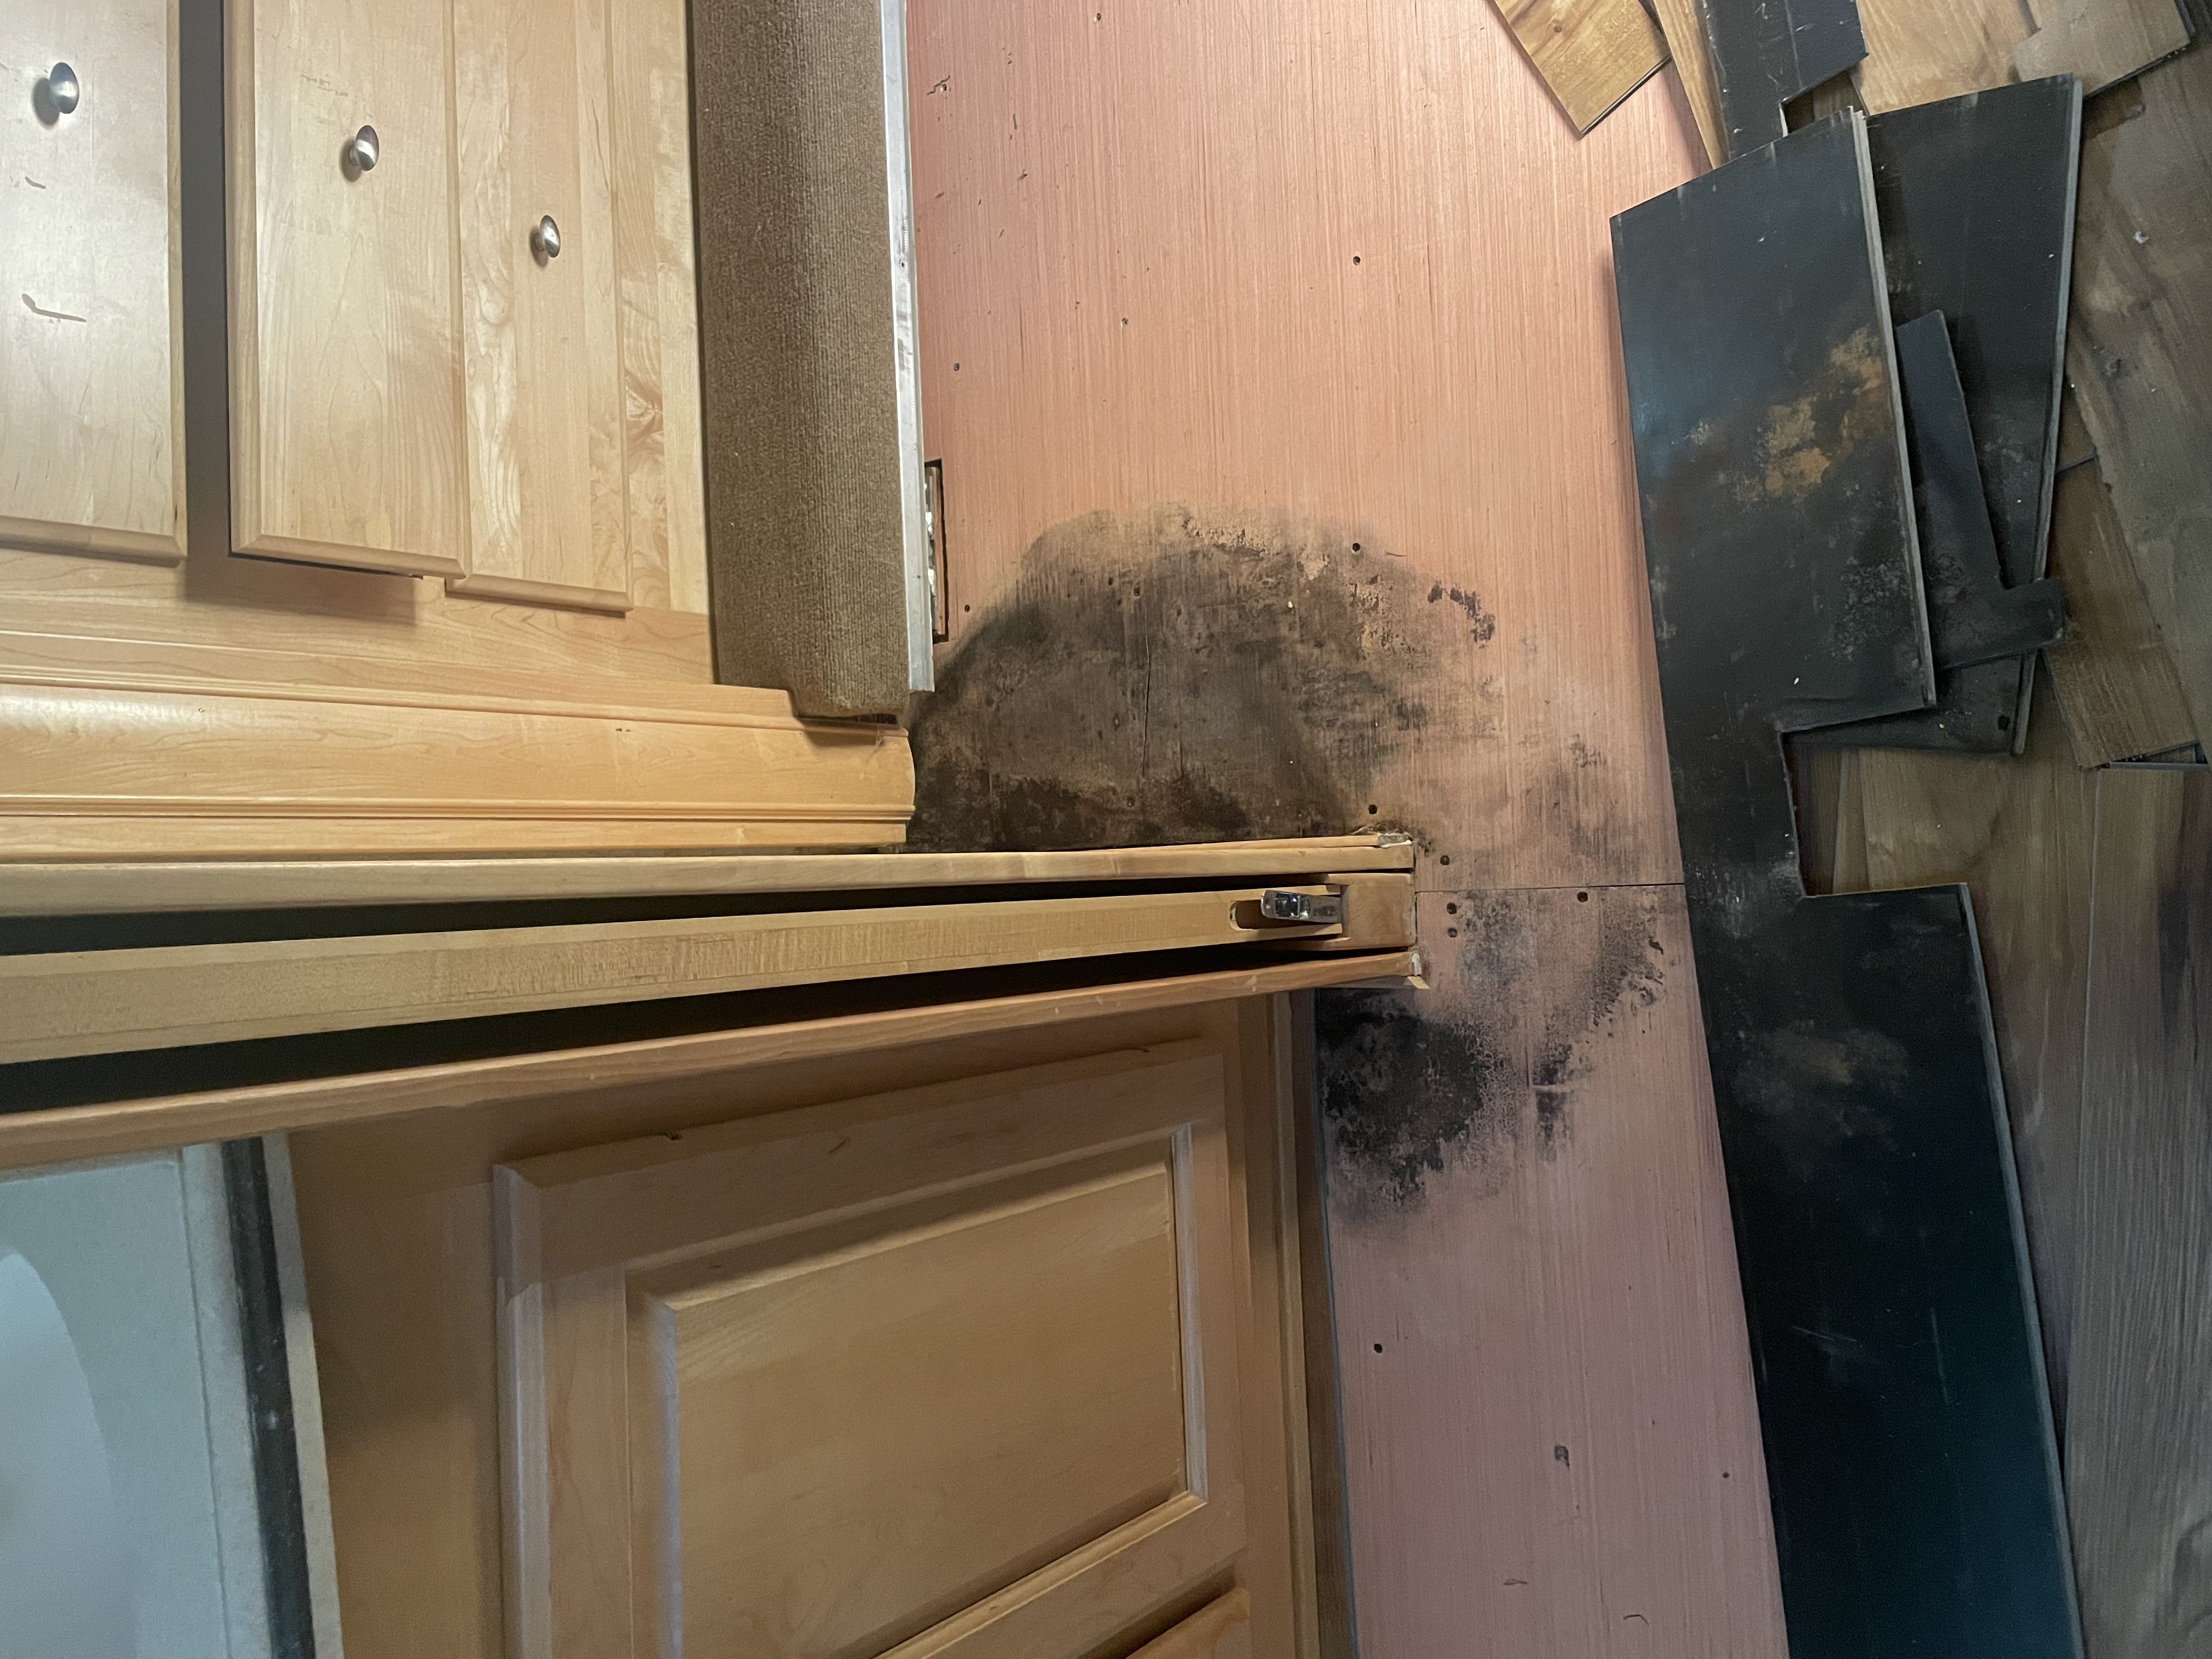
Maintaining your RV slideout seals is the single most important thing you can do to protect your RV slideouts from water intrusion. An article from Keystone RV identifies neglected seals as the leading cause of slideout leaks, and the downstream damage from an undetected leak, including subfloor rot, wall delamination, and mold, can easily cost more to repair than everything else in this guide combined.
Clean your seals regularly with mild soap and water. Remove any road grime, dirt, or debris from the folds. Inspect both the exterior and interior seals every trip. Both sets matter, and the interior seals are easy to forget about. Repair or replace any seal that is cracked, torn, stiff, or dislodged as soon as possible, including all wiper seals, bulb seals, and any RV slide out weather stripping around the perimeter of the slide room. A failing seal is actively letting water in.
Some RV owners choose to apply a rubber conditioner or RV slide out seal conditioner once or twice a year to keep the seals soft, flexible, and protected from UV damage, but Lippert (the manufacturer of the slideouts installed in many RVs) states that their seals are designed to need minimal treatment beyond cleaning. Seal conditioners may be more relevant for other brands, so check your documentation if you're not sure what you have.
If your wiper seals frequently get stuck and stay folded in instead of flipping out into the proper position, you can add stick-on strips to the side of your RV slides designed to help wiper seals flip outward properly when the slide extends, ensuring the seal makes full contact with the coach body.

Slideout Roof
Remove debris from the slideout roof regularly with a soft broom or brush. A quick check and sweep takes two minutes and protects both the roof membrane and the seals.
Inspect the roof membrane periodically for cracks, punctures, or separating seams. Minor damage can often be patched if it's caught early. Left alone, it can become a leak that costs thousands of dollars to repair.
Some manufacturers recommend waxing the slideout roof every spring and fall, making sure a thin layer of wax is always present on the surface – especially if you don’t have slideout toppers or slideout awnings. This reduces friction as the slide cycles in and out, and it helps prevent snow and ice from bonding to the roof in cold weather. If you're noticing chattering or vibration when the slide moves, try waxing the roof before assuming something mechanical is wrong.
Slide Topper and Awning
Inspect the topper fabric and end caps regularly for wear, tears, and damage. Inspect and reseal it as needed. Pay particular attention to the seam where the topper fabric meets the coach body, as that seam is a common water intrusion point that often goes unnoticed until water has already been getting in for a while.
Hardware
Periodically check and tighten any loose screws or bolts on the underside of the slide. Keystone specifically calls this out as part of routine slideout maintenance. Also inspect the floor covering underneath the slide room for cleanliness and any signs of wear or water damage. If the slideout floor is carpeted, press along the edge of the floor with your hand to feel for soft spots, as these could signify water intrusion that has led to floor rot.
Battery and Electrical
Keep your battery fully charged before operating your slideouts. Low voltage is a leading cause of motor strain, thermal overload, and premature motor failure. If you're having trouble with a slideout that's slow or stops mid-travel, check the voltage before assuming a mechanical problem.
Check battery terminals, control switch connections, and motor leads under the chassis for corrosion and looseness. Lippert notes in their service manuals that most electrical slideout issues trace back to poor ground connections rather than motor or controller problems.
Professional Inspection
Some manufacturers require annual inspection by an authorized dealer or service provider as a condition of maintaining structural warranty coverage. Check your warranty documentation to understand what your specific RV requires.
Even if your warranty doesn't require it, an annual professional RV inspection is useful because a certified RV technician can catch things that are easy to miss during routine owner maintenance, and catching a developing problem early is almost always cheaper than repairing it after it fails.
RV Help can connect you with a certified mobile RV technician who will come to wherever you and your RV are located for an annual maintenance inspection, or for a more comprehensive inspection, you can schedule a top-to-bottom inspection with an NRVIA-certified RV inspector.
One thing to note: NRVIA-certified inspectors who are also certified technicians cannot both inspect and repair your RV. The NRVIA considers this to be an ethics violation because a dishonest inspector could tell you about repairs you don’t actually need in order to make money on the repairs. If you want the same person to both inspect your RV to find out what it needs and then do any work that comes up, it’s important to clarify in your initial request that you’re wanting a maintenance inspection, not a pre-purchase inspection.
How to Lubricate RV Slideouts (and Whether You Should)
RV slide out lubrication is where slideout maintenance gets system-specific, and it’s the step that causes the most confusion. The right answer depends entirely on what kind of RV slide out mechanism you have. Using the wrong lubricant on the wrong RV slide out lubrication points, or lubricating a system that doesn’t need it, can cause costly damage. Before applying anything, check your owner’s manual and your slideout system manufacturer’s documentation.
One rule applies to all systems: avoid anything oil-based or greasy. Oil-based lubricants attract dirt and grit, which works into the moving parts and accelerates wear. For systems that do require lubrication, dry silicone-based sprays or wax-based chain lubricants are the appropriate options.
Here's how lubrication works for each major slideout system type, with notes on how to identify which one you have:
Rack and pinion (through-frame). The most common system on towables and many motorhomes. You can identify it by the toothed metal rail that runs along the bottom of the slide, visible when the slideout is extended. The motor drives a gear along this rail to push the slideout in and out, and the mechanism passes through the RV's chassis frame, so it's visible from the undercarriage. Lippert and BAL/Norco both make rack and pinion systems.
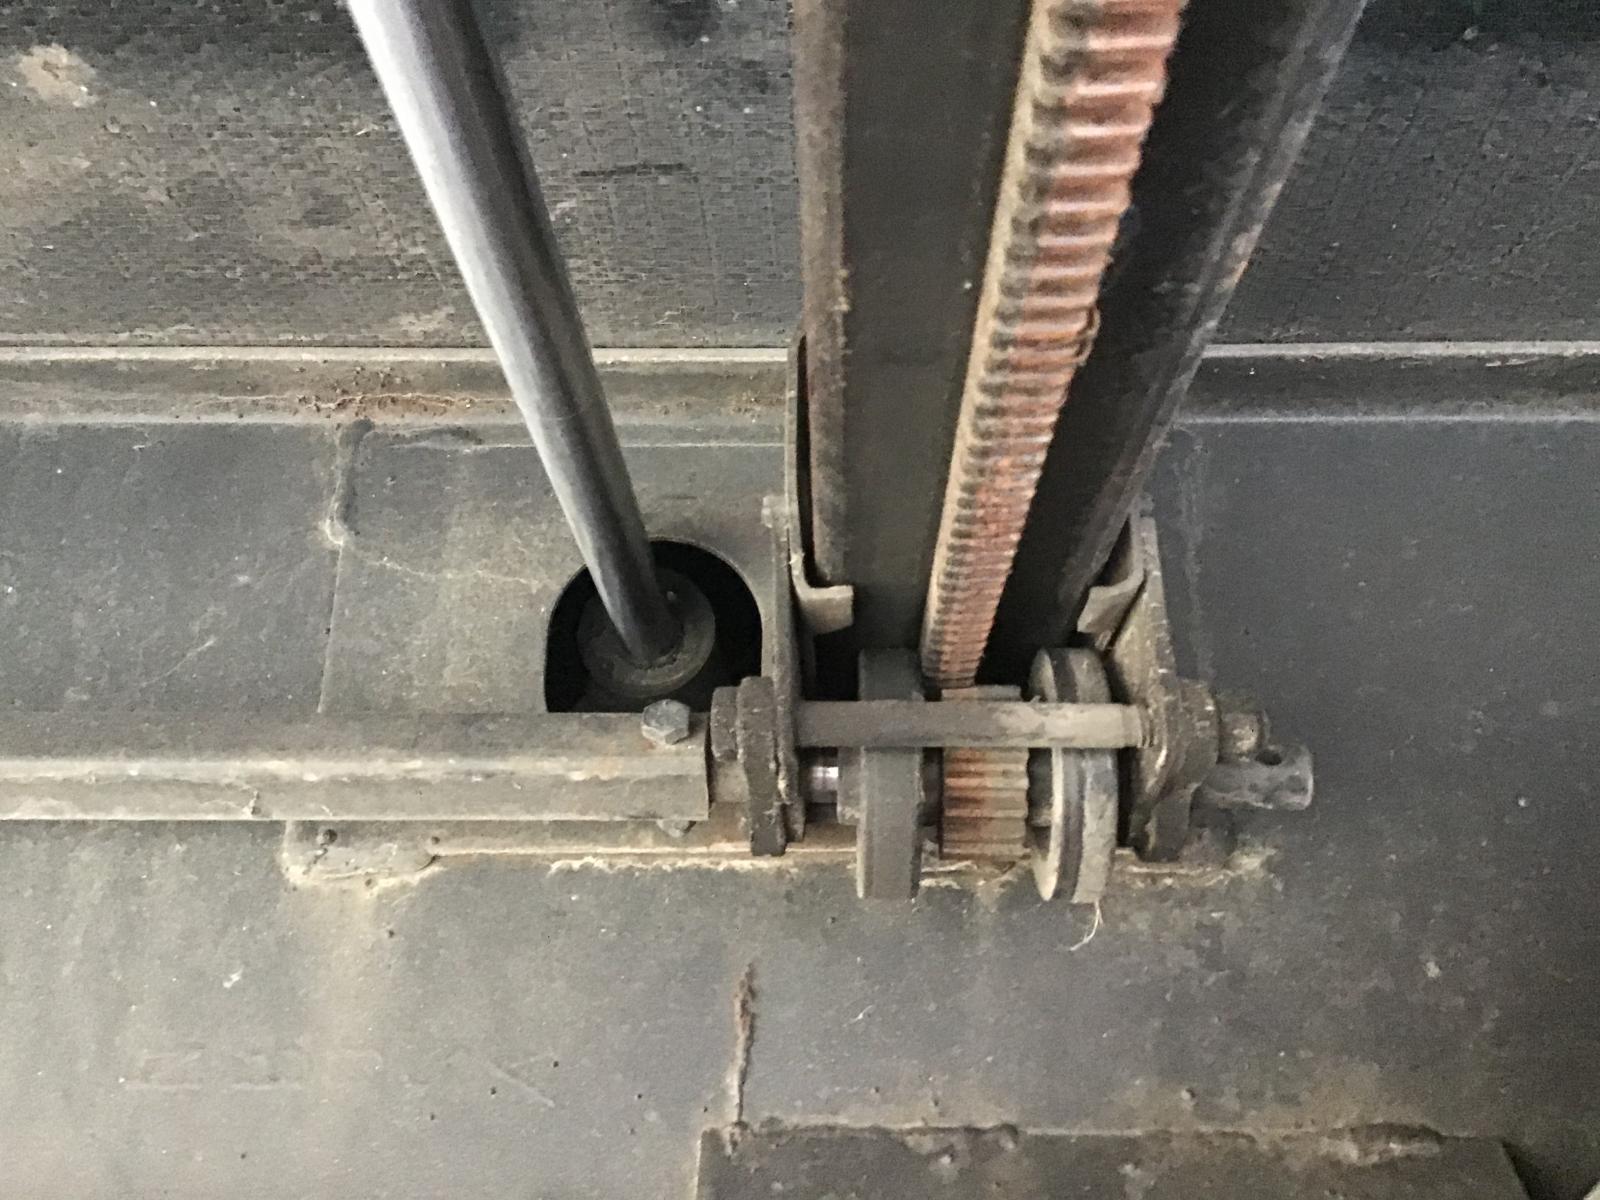
Rack and pinion RV slide out maintenance requires routine lubrication with a dry silicone spray applied to the rails and gear teeth. Lubricate on a regular schedule rather than waiting for noise. WD-40 Dry Silicone Spray is one example of an appropriate product.
In-wall (Schwintek). Common on travel trailers and fifth wheels. Identified by aluminum tracks with small worm-gear grooves running along them, visible on the sidewalls of the slideout box near the top and bottom. The motors are built into the wall portion of the slideout room mechanism rather than underneath the floor.
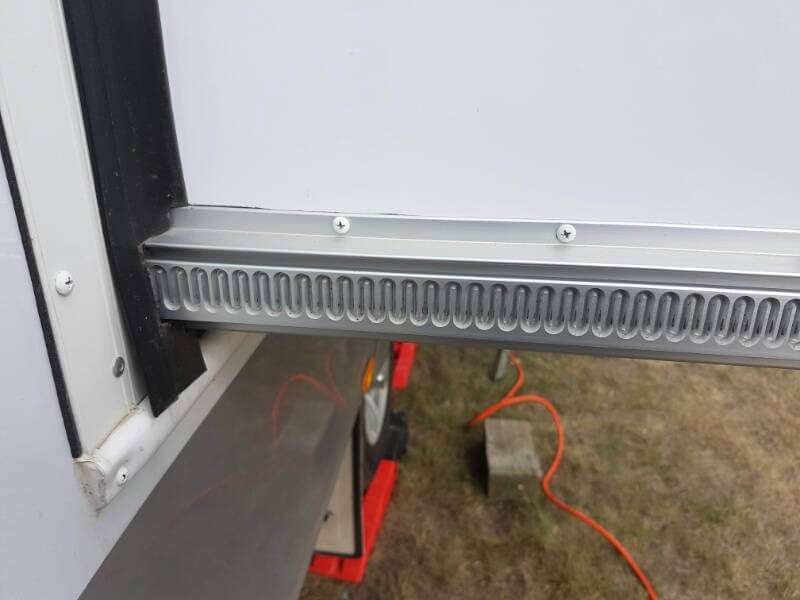
Schwintek RV slide maintenance differs from every other system type in one important way: Lippert’s current official guidance is that these systems require no lubrication. An older 2014 video showing Schwintek lubrication was removed by Lippert because it was causing confusion. That video addressed a specific noise issue in certain older units and was never intended as general maintenance advice. If you have a Schwintek system, do not lubricate it based on that video or any advice derived from it.
Hydraulic. Common on larger Class A motorhomes. Identified by hydraulic cylinders and fluid lines attached to the slideout room. There's no external gear rail. One hydraulic pump typically powers multiple slides. HWH Corporation and Lippert are among the manufacturers that make hydraulic slideout systems.
Hydraulic slideout systems don't require lubrication in the traditional sense, but they do require hydraulic fluid maintenance. Check the reservoir level regularly, inspect hoses and fittings for leaks, and top off with the fluid type specified by your manufacturer.
Some hydraulic systems also have gear tracks or alignment components that keep the slide room moving on the correct path. If yours does, check your documentation for the correct lubrication approach for those components.
Cable-driven. Uses cables routed through pulleys to move the slide in and out. Cables may be visible inside the coach above the slideout room or along the outside of the slideout box. BAL's AccuSlide and EXACT-Slide are among the most common cable systems.
Cable systems generally require no lubrication when properly installed and maintained. If a pulley is squeaking, a light application of dry lubricant may help, but consult your manufacturer's documentation before applying anything.
If you're not sure which system you have, the most reliable starting point is your owner's manual. You can also look for a manufacturer's label on the mechanism itself, which is usually visible when the slide is fully extended. Searching by your RV's make, model, and year will often surface the answer in forum threads or manufacturer documentation. If you're still not sure before lubricating, ask a certified RV technician rather than guessing.
Frequently Asked Questions
How does a slideout on an RV work?
A slideout is a section of the RV's living space that extends outward when parked, mounted on a track or rail system. Depending on the type, an electric motor or hydraulic pump drives the movement. Electric systems use gear rails, in-wall track mechanisms, or cables to push or pull the slideout room in and out. Hydraulic systems use pressurized fluid and cylinders.
All systems have a seal around the perimeter of the slide that compresses against the coach body when retracted to keep out weather, insects, and road debris. That seal is what most of the maintenance in this guide is protecting.
How often should I do my RV slide maintenance?
At a minimum, visually inspect your seals and slideout roof before every trip, and always check the roof for debris before retracting. Every three months, lubricate per your manufacturer's specs if applicable, inspect the slide topper, check hydraulic fluid levels if you have a hydraulic system, and tighten any hardware. Every six months, condition your seals and do a thorough mechanical inspection. Once a year, schedule a professional inspection if your manufacturer requires this to maintain warranty coverage.
The RV Help app's RV maintenance tracker can send reminders for all of these so nothing slips through the cracks between trips.
What is the best RV slideout lubricant?
There is no single best slide-out lubricant for all RVs because the right product depends on your specific system. Avoid anything oil-based or greasy regardless of system type. For rack and pinion systems, a dry silicone spray such as WD-40 Dry Silicone is typically correct. For some through-frame systems, a wax-based chain lubricant like DuPont Chain-Saver is the manufacturer recommendation. Lippert's Schwintek in-wall system requires no lubrication at all. Cable systems generally don't require lubrication either. Always check your owner's manual and slideout manufacturer documentation before applying any product.
Do I need to condition my RV slide seals?
Our official answer is, it might not be necessary, but it also can’t hurt. A rubber conditioner or UV protectant applied twice a year keeps seals soft and pliable, which allows them to compress and seal correctly and extends their lifespan significantly. The exception is Lippert-branded seals, which Lippert states are designed to need minimal treatment beyond regular cleaning with soap and water.
When in doubt, check your owner's manual or contact your RV manufacturer.
Do I need to know how to adjust a slideout on a RV?
For most slideout systems, RV slide out adjustment is not a routine owner task. The main exception is the Schwintek in-wall system, which can fall out of sync and produce a crooked or uneven slide. When that happens, there is a retiming procedure that owners can often perform themselves without a service call. That procedure is covered in detail on the Lippert website.
Final Thoughts on How to Maintain RV Slideouts
RV slide maintenance isn't complicated, but it does have to be consistent. The seals, the roof, the battery, the hardware, and the right lubrication approach for your specific system are what stand between you and an RV slideout repair call in the middle of a trip.
If something does go wrong despite your best efforts, our companion article about common RV slideout problems will help you know what to try before calling a technician.
And when you do need a tech, use RV Help to connect with a certified mobile RV technician who can come to wherever you are.
FREE RV Maintenance Checklist Spreadsheet
A printable and editable spreadsheet to help you stay on top of RV maintenance tasks. Organized by frequency, with space to add notes and track completion dates, so you can keep your RV in top condition year-round.
By submitting this form, you'll receive our newsletter and the free download. You can unsubscribe at any time.