
RV Furnace Maintenance to Do Before Cold Weather
If you plan to camp in chilly weather—or live full-time in your RV through the winter—your furnace becomes one of the most important systems in your rig. RV furnaces are reliable workhorses, but they depend on clean airflow, safe propane delivery, and proper ventilation to run efficiently. A little RV furnace maintenance now can help you stay warm all season and prevent costly breakdowns when temperatures drop.
This guide walks you through the essential steps to get your RV furnace ready for winter.
1. Check Exterior Furnace Vents
Every RV furnace relies on exterior intake and exhaust vents to bring in fresh air and safely vent combustion gases. If these vents are blocked, the furnace can overheat, shut down, or run inefficiently.
Take a few minutes to locate the exterior furnace vent (usually a metal panel with slotted openings) and make sure they are clear of mud dauber nests, spider webs, leaves, and dust. If you use add-on vent screens, make sure they’re clean and not restricting airflow.
Keeping this area clear helps your furnace operate safely and maintain proper combustion.
2. Inspect and Clean the Furnace Compartment
Because RV furnaces don’t typically use replaceable interior filters, dust can build up inside the furnace compartment, restricting airflow and reducing efficiency.
If your RV furnace allows owner access, remove the interior access panel and carefully use a soft brush or vacuum attachment to gently brush out or vacuum dust and loose debris. Avoid touching wiring, burners, or removing any components.
This quick cleaning helps the blower move air more freely and keeps dust from circulating through your RV.
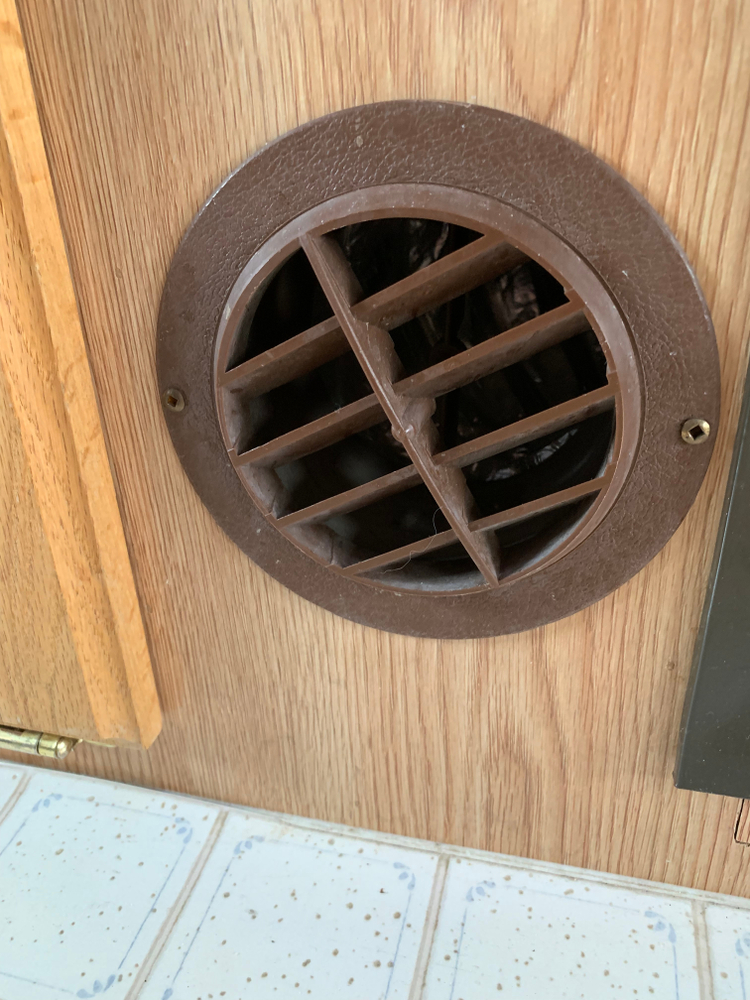
3. Clean the Furnace Air Return
A clean return area ensures the furnace gets enough air to operate correctly. Instead of a traditional filter, most RV furnaces rely on an unrestricted air return area. Anything that blocks this return—pet hair, lint, stored items, or even bedding—can reduce airflow and strain the furnace.
Before running your furnace, identify the air return grille (often near the floor), remove it and vacuum the inside and surrounding area. Make sure furniture, bags, and pet beds are kept at least several inches away.
4. Vacuum Heat Ducts (If Accessible)
If you can access the ducting in your RV, giving it a quick clean can make a noticeable difference in the air quality in your RV, reducing dust, pet dander, and allergens. Clean your furnace ducts by removing the vent covers and vacuuming inside as far as your vacuum hose will reach.
5. Test the Thermostat and Run the Furnace Before the First Cold Snap
If you know you'll be relying on your furnace for warmth, it’s smart to test it before you need it. Turn the furnace on and let it run long enough to confirm it’s heating properly and sending warm air throughout the RV. Replace thermostat batteries if they are used. A temporary burning-dust smell is normal during the first few minutes of operation, but listen for unusual noises such as squealing or repeated clicking. This simple test run gives you time to deal with any issues before temperatures drop below freezing.
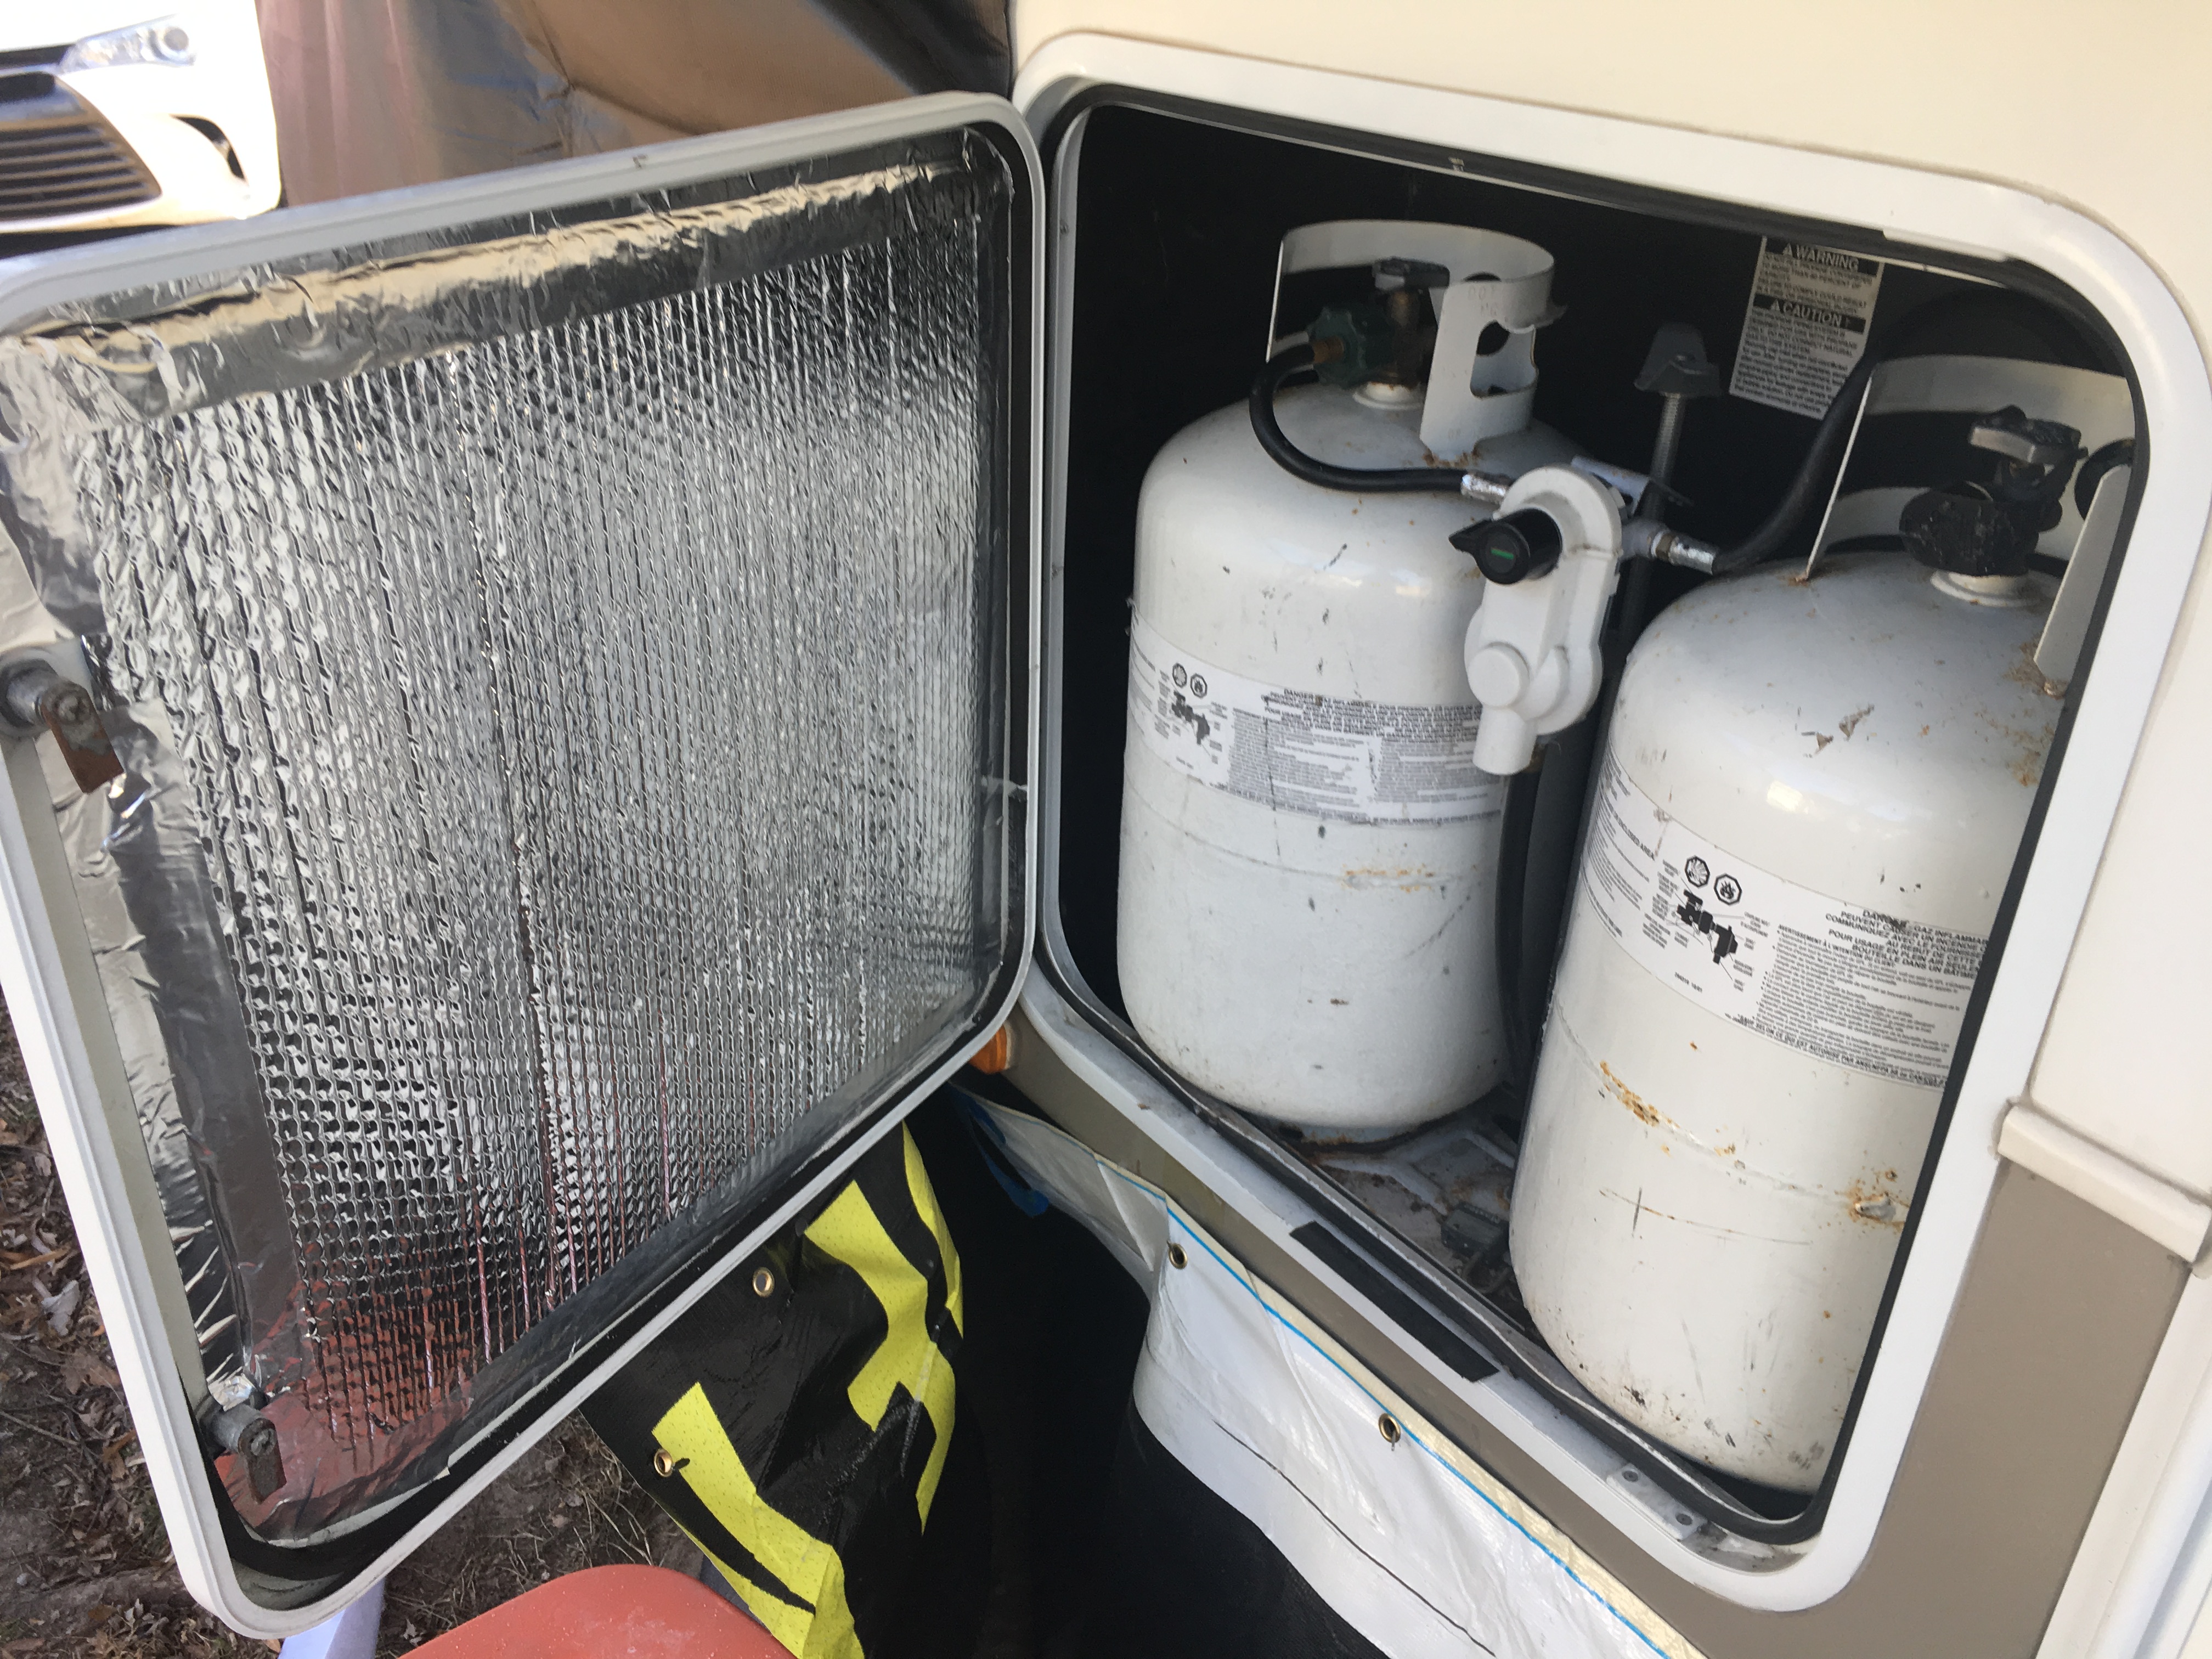
6. Inspect Propane Tanks, Lines, and Recertification Dates
Propane issues are one of the most common causes of furnace trouble. Start by checking your propane levels and visually inspecting the propane lines and hoses for cracking, wear, or abrasion. You can also perform a simple bubble test on exterior fittings using a mixture of dish soap and water; bubbles indicate a leak, in which case you should turn off the propane immediately and contact a technician.
This is also a good time to look at the propane tank’s recertification date. Portable propane cylinders must be recertified every seven years. You’ll find the manufacture date stamped on the tank’s collar. If your tank is out of date, make arrangements to recertify or replace it before winter.
7. Check Detectors and Fire Safety Equipment
Because propane appliances are used more frequently in cold weather, it’s essential to make sure your safety equipment is in good working order. Test both the carbon monoxide detector and the propane leak detector. Replace their batteries annually—beginning of fall is a convenient time—and replace the units themselves if they’re expired, as most detectors have a five- to seven-year lifespan.
Your fire extinguisher deserves attention too. It should be kept within 2 feet of the entrance to the RV, where it can be quickly accessed from outside—not buried in a cabinet. Check that the pressure gauge is in the green. RV technician Bryan Carbonell recommends flipping the extinguisher upside down every so often to loosen the dry chemical inside, which can compact during travel and reduce its effectiveness.
Track Your Furnace Maintenance in the RV Help App
Remembering when you last cleaned your furnace compartment or tested your detectors can be tough, especially if you only use your furnace seasonally. The RV Help app's free maintenance tracker lets you log each of these tasks as you complete them and set custom reminders for annual checks like propane line inspections and detector battery replacements.
The app also includes step-by-step instructions for each maintenance task, so you'll always know exactly what to check. And if you need to reference your furnace model number or warranty information while troubleshooting, you can store all your owner manuals and serial numbers in the app's virtual glovebox—no more digging through cabinets or searching your email for PDFs.
Haven't downloaded the app yet? Get it here.
When to Call a Mobile RV Technician
Even with proper maintenance, furnaces can sometimes develop issues that require a professional.
Call a technician if you notice:
The furnace fails to ignite or shuts off repeatedly
Soot buildup around the exterior exhaust
Breakers keep tripping during furnace operation
A lingering propane odor or burning smell (other than initial dust burnoff)
Loud squealing or grinding from the blower motor
A mobile RV tech can diagnose and repair these problems on-site—especially helpful if your RV is already set up for winter.
Tips for Conserving Propane and Improving Furnace Efficiency in Cold Weather
Propane usage increases dramatically in cold weather. A few small upgrades can dramatically improve the furnace’s efficiency and stretch your propane supply.
Seal drafts
Add foam weatherstripping around doors and windows.
Check slide seals for gaps.
Seal cabinet openings near plumbing where cold air often sneaks in.
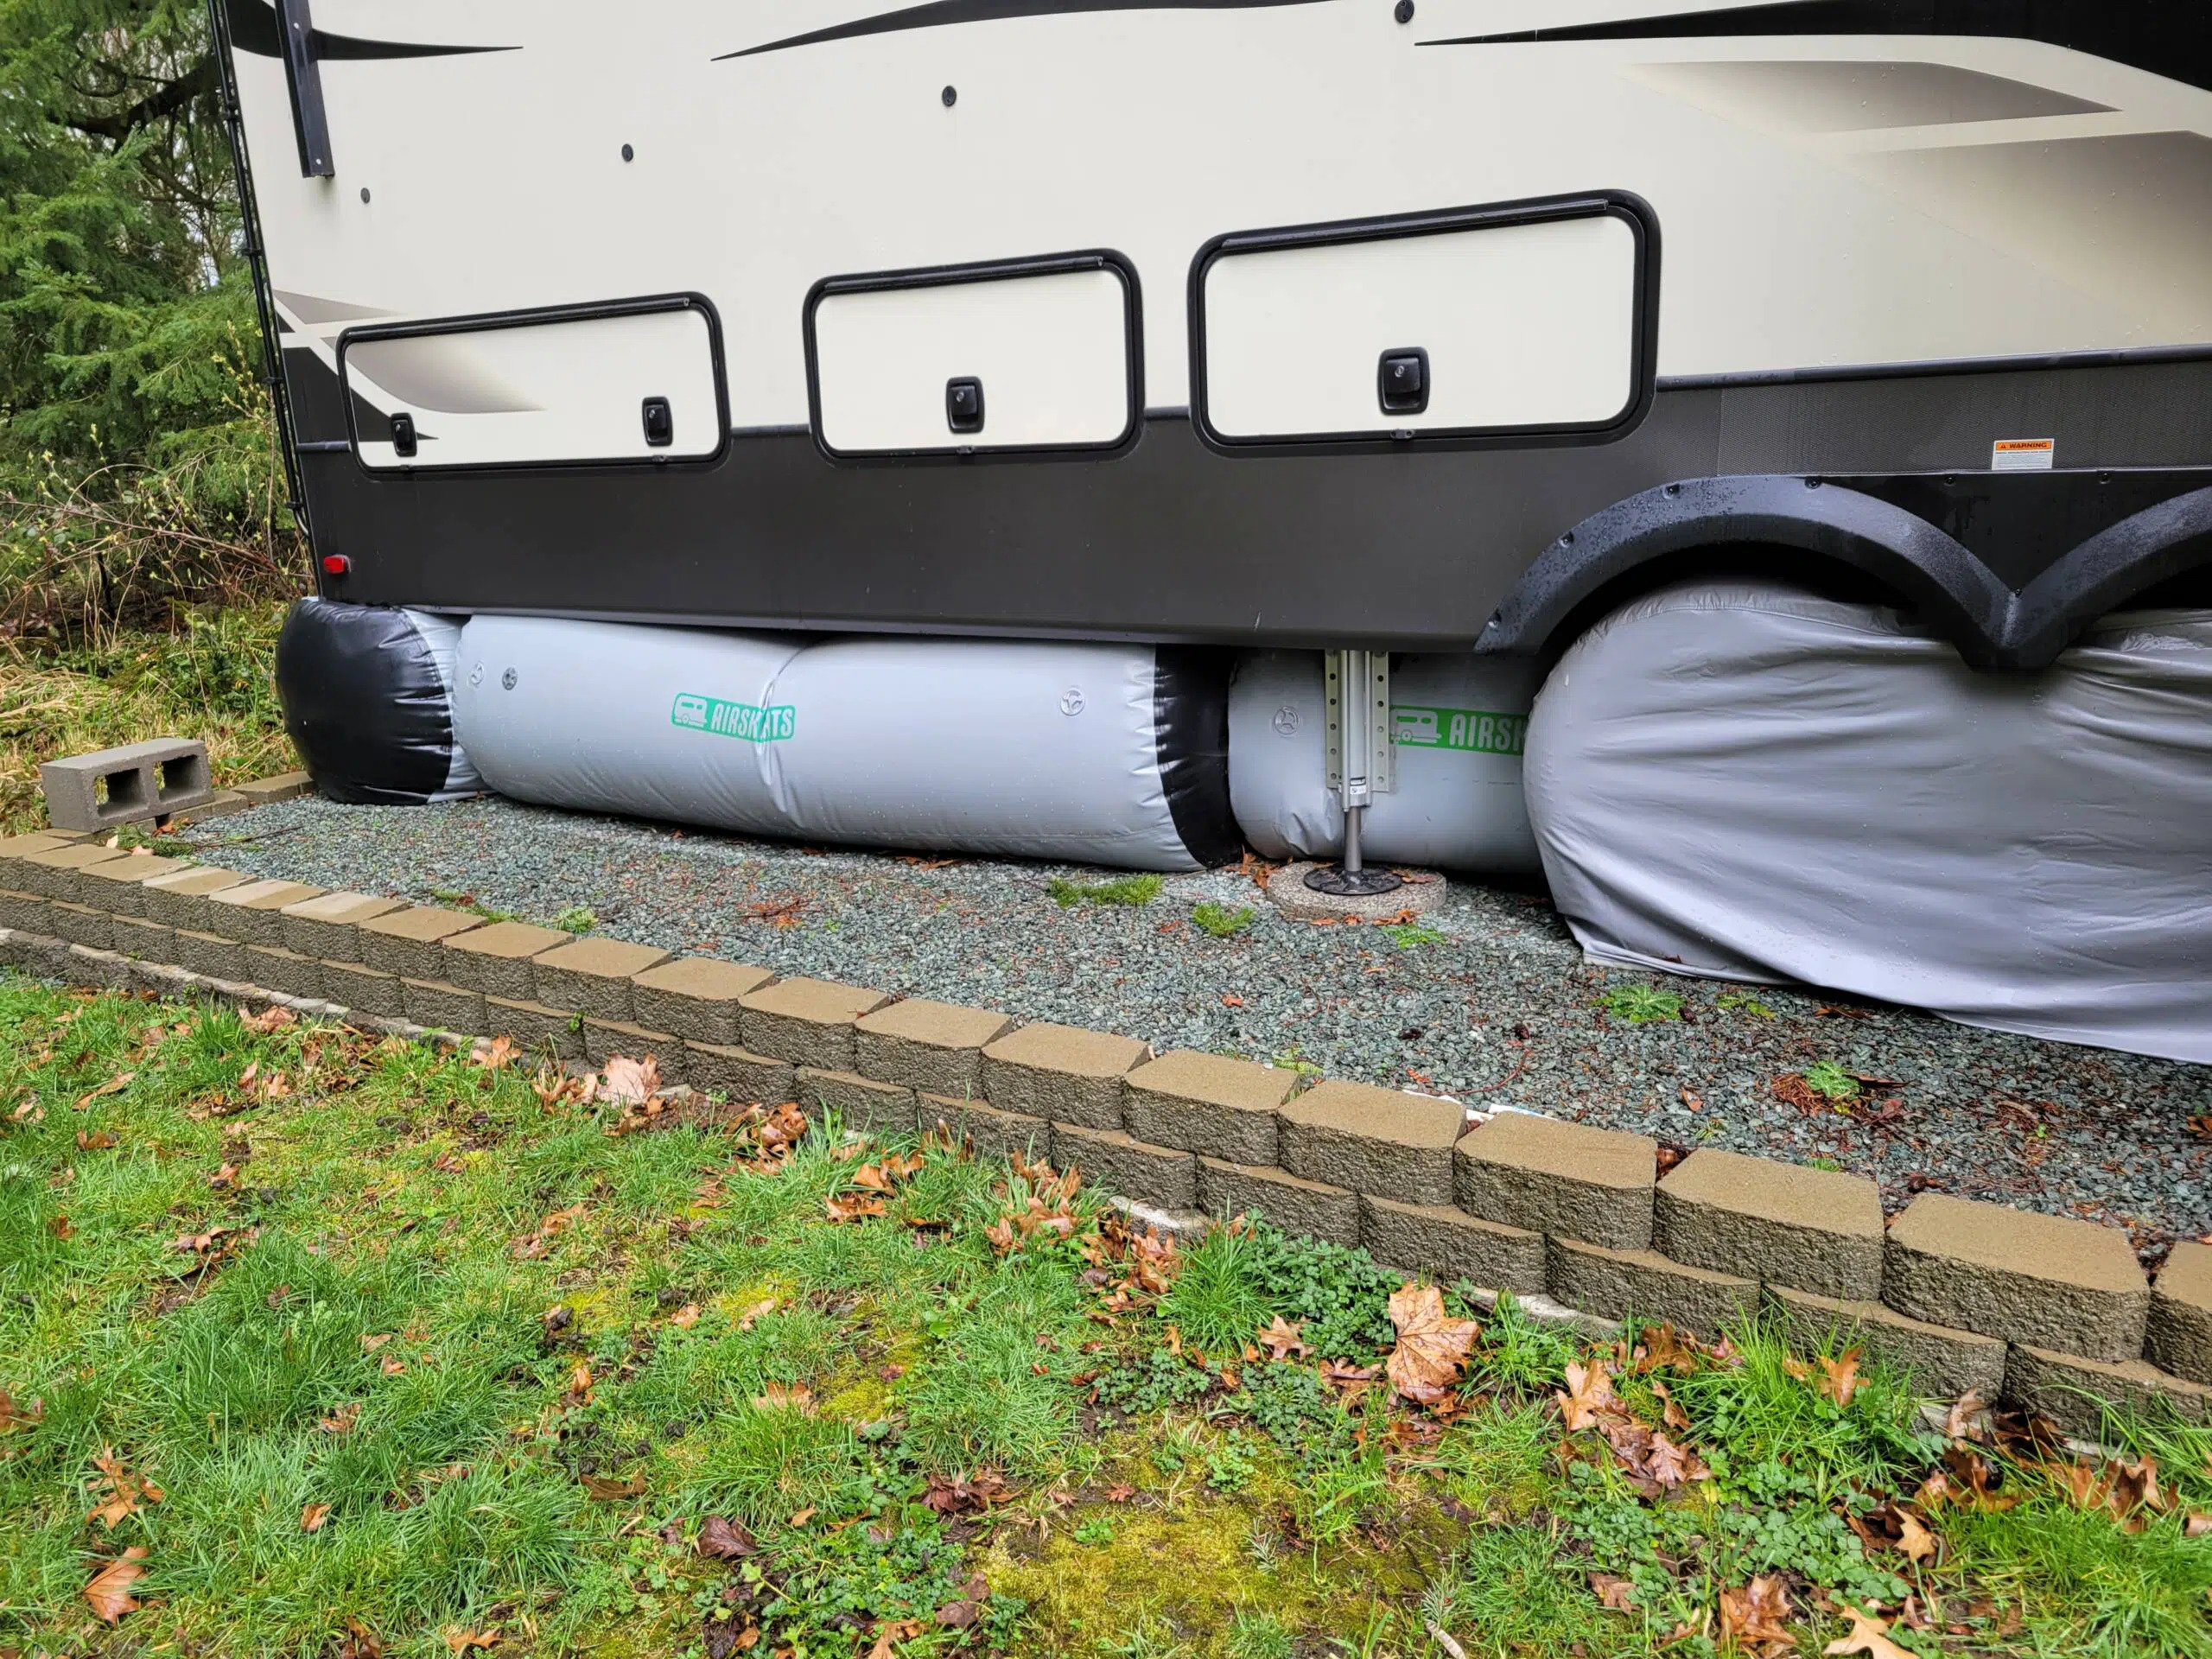
Skirt the RV
Skirting blocks cold air from circulating under the RV, reducing heat loss and helping keep your tanks from freezing.
Options include:
Vinyl skirting
Rigid foam board for temporary setups
Inflatable skirting for RVers who need a temporary setup
Add insulation to windows
Single-pane glass RV windows is one of the biggest sources of RV heat loss. To slow heat loss and prevent condensation, RV windows can be insulated using:
Shrink-film window insulation kits.
Thick thermal curtains
Bubble wrap or Reflectix
During the day, sunlight is one of the best free sources of heat for your RV, so we would recommend choosing a window insulation method that doesn't block the light.
Insulate floors and slide-outs
Adding area rugs to bare floors can make a big difference in keeping your RV interior warmer. To slow heat loss through the floors of slides, attach rigid foam board to the underside of each slide on the outside. Just remember to remove it before bringing in the slides!
Stay Warm and Worry-Free This Winter By Staying On Top of RV Furnace Maintenance
Preparing your RV furnace for winter doesn't require advanced skills—just a bit of cleaning, a few safety checks, and a test run before temperatures drop. With these RV furnace maintenance steps, you'll reduce wear on your furnace, improve efficiency, and stay warm and comfortable all season long.
Ready to simplify your RV maintenance? Download the free RV Help app for iOS or Android to access the maintenance tracker, store your furnace manual in your virtual glovebox, and get reminders when it's time for your next seasonal check. Your warm, cozy winter RV awaits!
FREE RV Maintenance Checklist Spreadsheet
A printable and editable spreadsheet to help you stay on top of RV maintenance tasks. Organized by frequency, with space to add notes and track completion dates, so you can keep your RV in top condition year-round.
By submitting this form, you'll receive our newsletter and the free download. You can unsubscribe at any time.